
Wow the title is such a mouthful and so is this blog, so get your popcorn ready and get cosy friends cause we are going to try and capture everything we need to do, so we can use vRSLCM 2.0 to :
- Deploy vRA 7.4 and then
- Upgrade it to vRA 7.5
Just like that! how awesome is that ? So lets get started Eh!
Lab Overview
Deploying vRA 7.4 will consist of the vRA appliance ( mgmt-vra-02 ) and the IAAS windows machine ( mgmt-iaas-02 ) that will be running the vRA windows services and other important components. these two components does not exist yet.
In the lab we will be running vSphere 6.7 , SQL 2016 and vRSLCM 2.0 that were already configured.

Prerequisites
Please be aware that this what I did in my lab, so some of the items can be done in different ways if available.
- DNS A Records for both ( mgmt-vra-02 ) and ( mgmt-iaas-02 )
- AD Service account ( administrator@vmwarelab.org )
- Downloading the required software from VMware website to an NFS share that you can access from vRSLCM Appliance :
- VMware vRealize Automation 7.4.0 OVA file.
- VMware vRealize Automation 7.5.0 OVA file.
- VMware vRealize Automation 7.5.0 Update Repository.
- Microsoft SQL 2016 Server ( mgmt-sql-01 ).
- Microsoft Active Directory and DNS ( mgmt-dc-01 ).
- vRealize Suite Lifecycle manager 2.0 ( mgmt-lcm-01 ).
- vSphere 6.x vCenter ( mgmt-vcs-01 ).
- A quite and cosy place to work.
Step 1 : Adding Binaries
We have to add the binaries that we downloaded to the NFS share to vRSLCM. Once you are logged to vRSLCM , Select Settings -> Product Binaries -> ADD BINARIES. In my case my location is based on NFS so select NFS and enter the base location ( Case Sensitive ). Once completed hit DISCOVER to get the product binaries . Will select the product we downloaded and click ADD . Selected product binaries are automatically mapped to product versions.

Once completed you should see them listed under Product Binaries

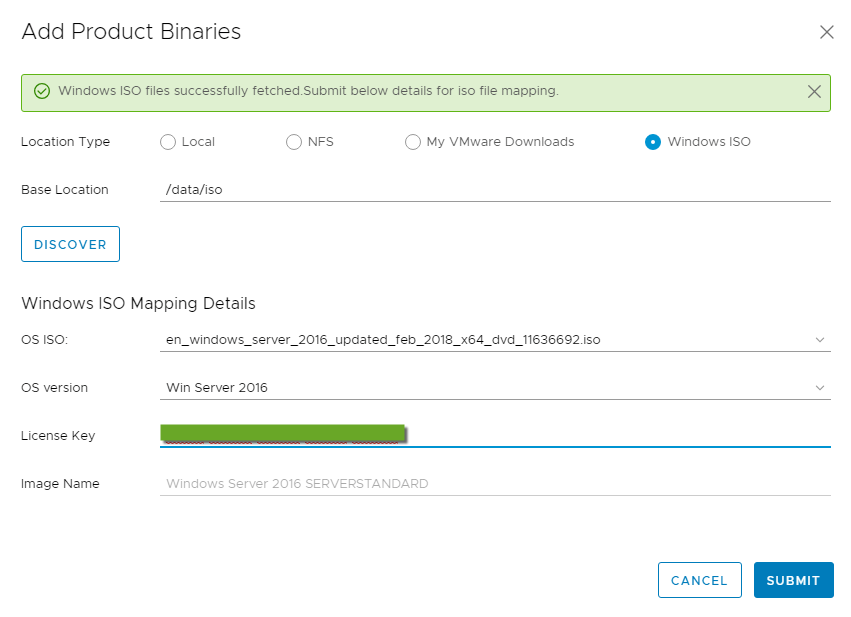
Another thing we need to do while we are here is copy a Windows ISO to vRSLCM via WinSCP for example to a folder I created under /data/iso. In may case I already copied Windows 2016 ISO to /data/iso so in vRSLCM i will select ADD BINARIE again but this time I select Windows ISO and point it to the Base Location where I copied it to then I hit DISCOVER.
Select the ISO image name that are pre-populated after a successful discovery from base location, and fill the rest of the required fields as outlined below and click SUBMIT
One Important Note here is that Windows ISO has to be a Standard Edition for any of the following supported Windows editions :
- Windows Server 2008 R2
- Windows Server 2012 and 2012 R2
- Windows Server 2016
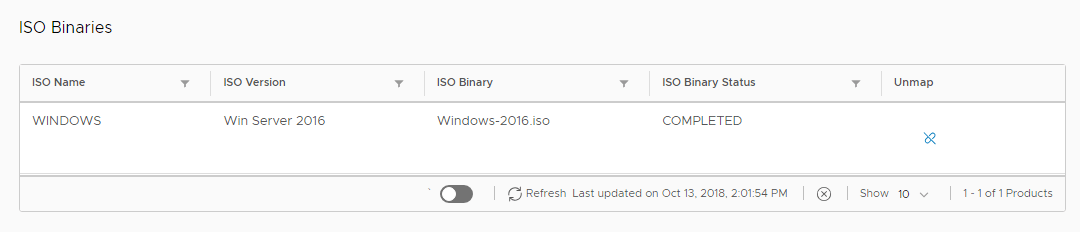
Once completed again you should see it listed under the ISO Binaries.
Step 2 : Adding A Subject Alternative Names (SAN) Certificate
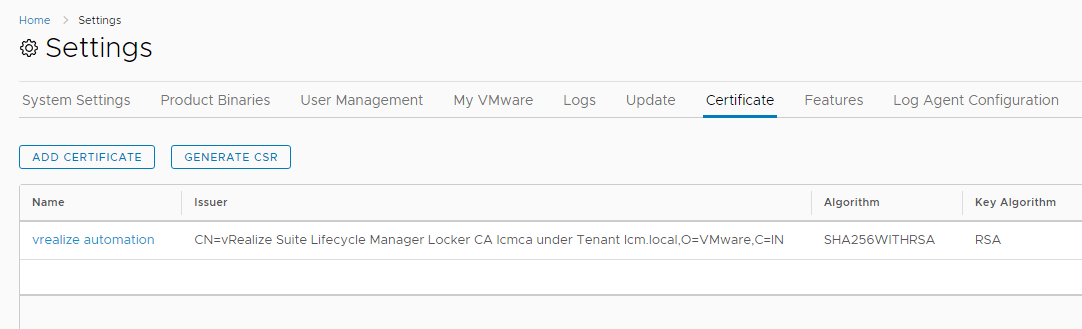
We will need to generate a certificate that we will reference later when you select to install vRA 7.4 , so lets go to Settings -> Certificate -> ADD CERTIFICATE and fill it similar to what I did in the figure below, then click GENERATE

Make sure the certificate is generated successfully and its listed in the certificates table. You can create a certificate for each of the vRealize Suite products Or you can use the same certificate for all products as long you make sure you enter all the HostName/Domain Names in the Domain Name section and there respective IP addresses in the IP Address section of the certificate.
If you are looking to how to deploy vRSLCM and Creating a SAN ( Subject Alternative Names ) Certificate using your CA Enterprise Server, Check out my colleague Steve Tilkens Blog Here
Step 3 : Creating an Environment To Install vRealize Automation 7.4
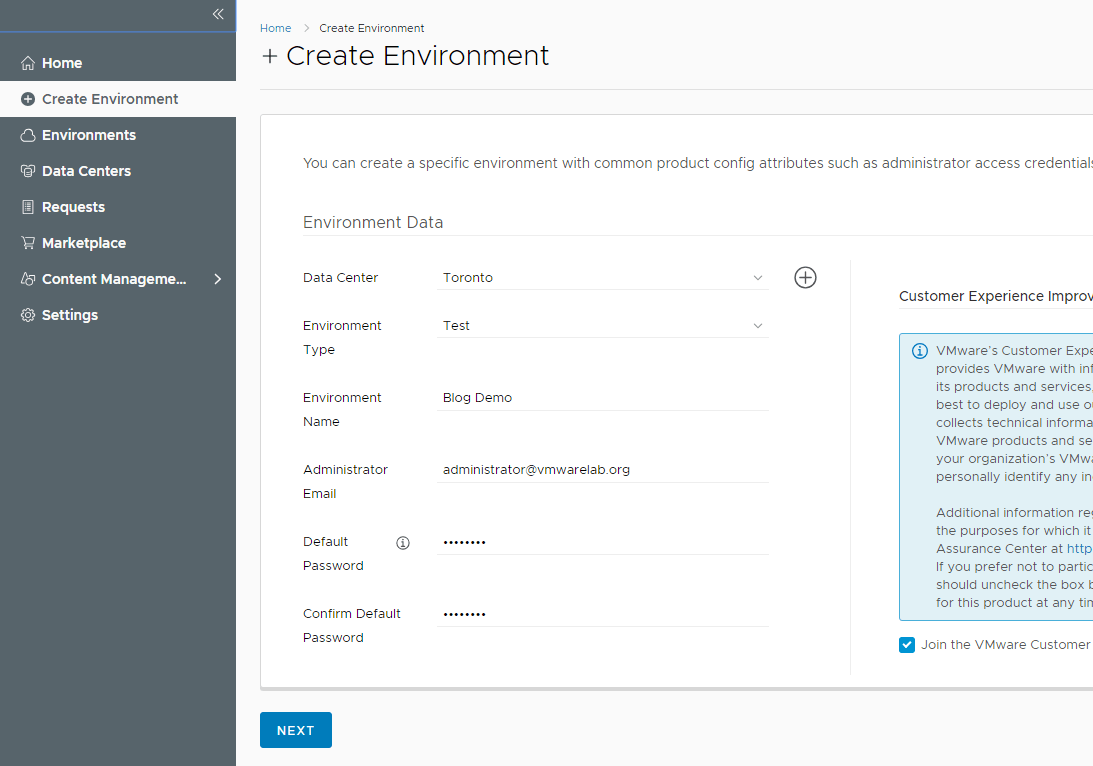
We will be creating an environment in vRSLCM where we will be installing vRA 7.4, assuming you have your Data Center and its associated vCenter Server already setup in vRSLCM.
login to vRSLCM and click on + Create Environment from the left pane. Select your Data Centre and Fill the required fields and click NEXT
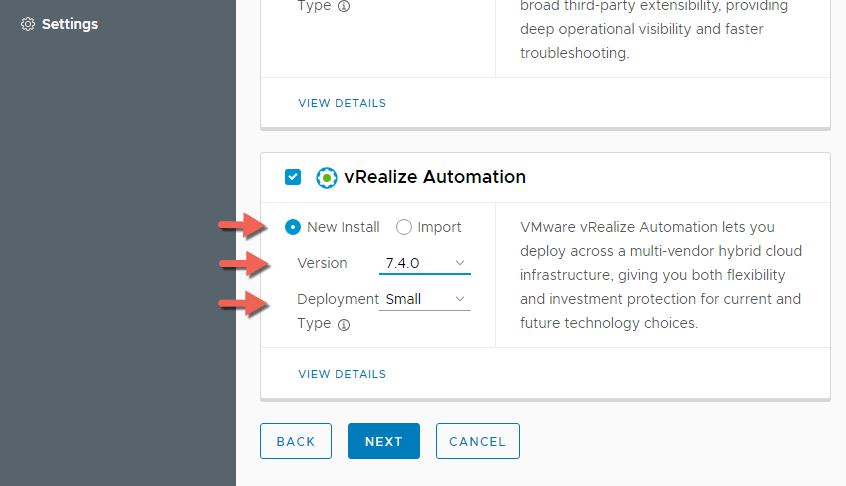
Under Products, Select vRealize Automation by checking the box -> New Install -> 7.4 -> Small Deployment and Click NEXT
Accept the terms and conditions of the end user agreement to proceed with the installation by scrolling all the way down and checking the box. after that click NEXT

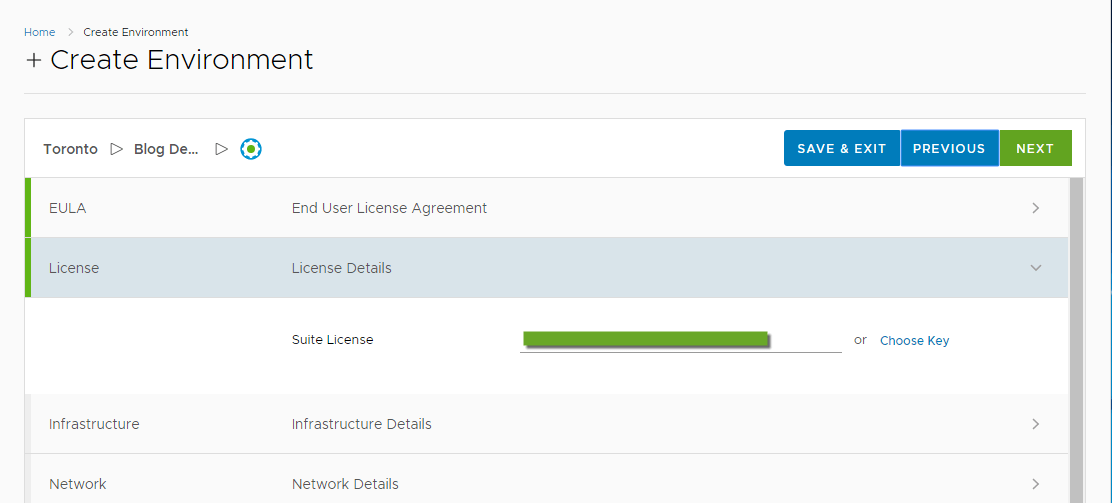
Enter the vRealize Suite license 2017 since we are deploying vRA 7.4 and click NEXT
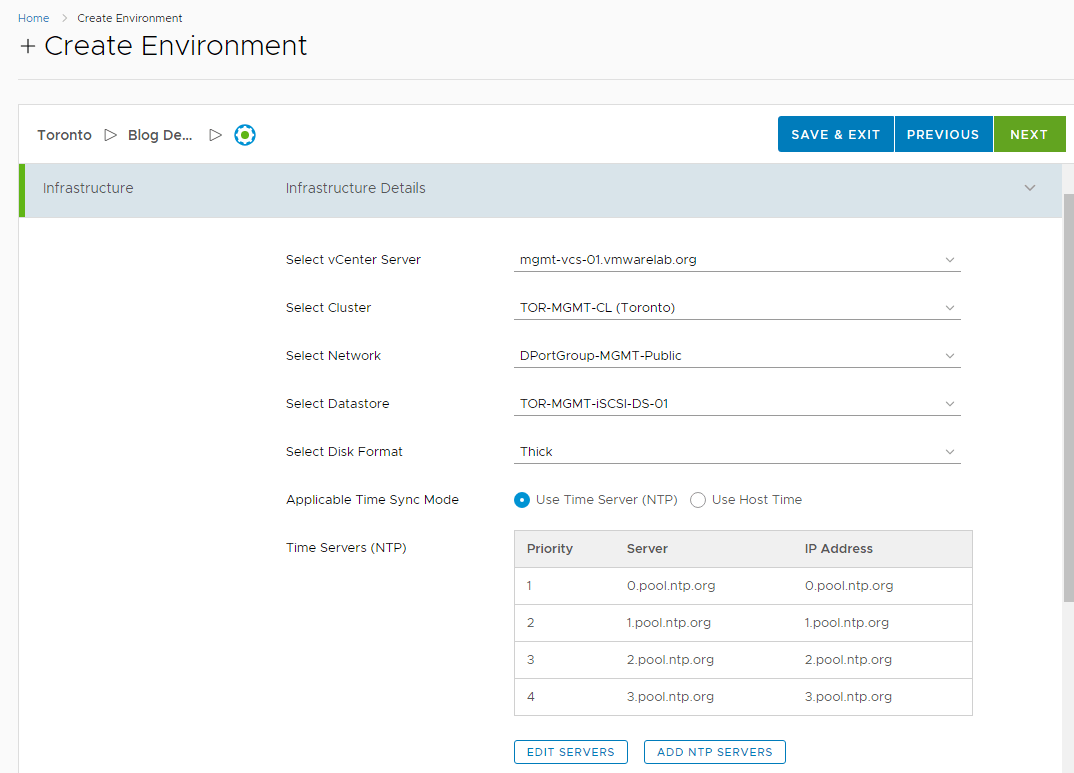
Using the drop down menus select all the applicable Infrastructure associated with the data centre you selected intialy when you created the environment, then click NEXT
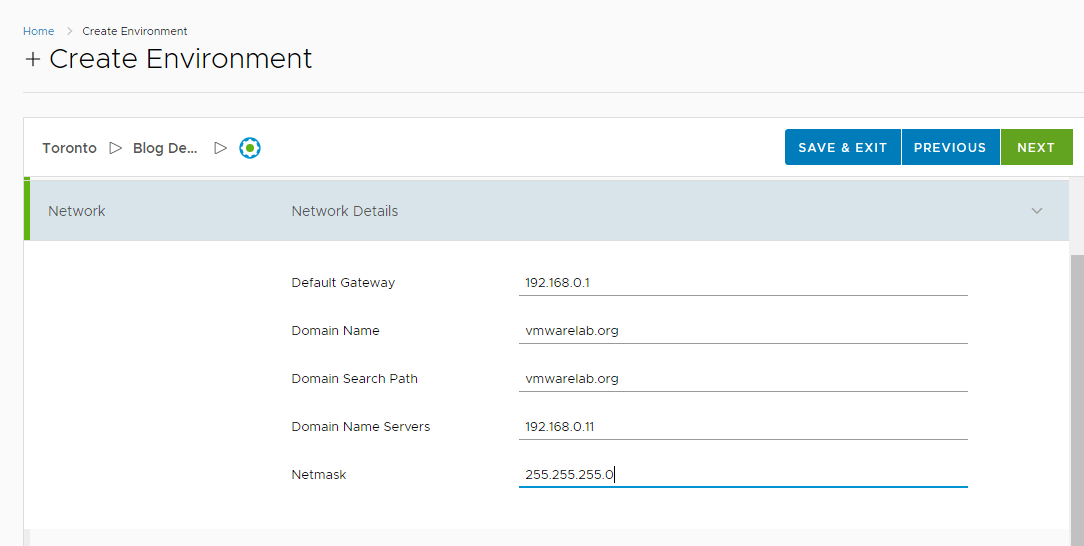
Fill all the network detail and click Next
Select the Certificate we created in Step 1 for vRealize Automation and click NEXT

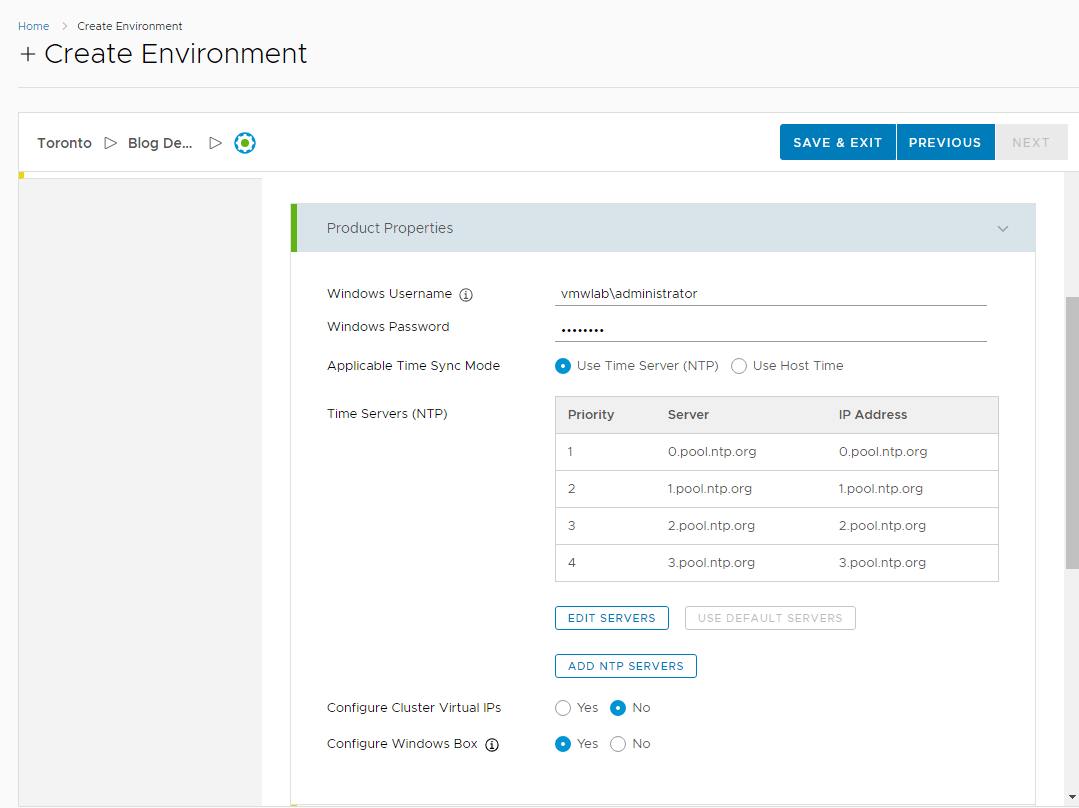
In the Products Details Section and under Product Properties enter the domain accout and password as (Domain\user) of the service account that have administrative rights on the IaaS windows server and can be used across all the IaaS Components and Services.
Select / ADD the NTP servers
Select No to configure Cluster Virtual IPs since this is a minimal install that will be using 1 vRA appliance.
Select Yes to Configure a Windows Box the will run the IaaS Components and services
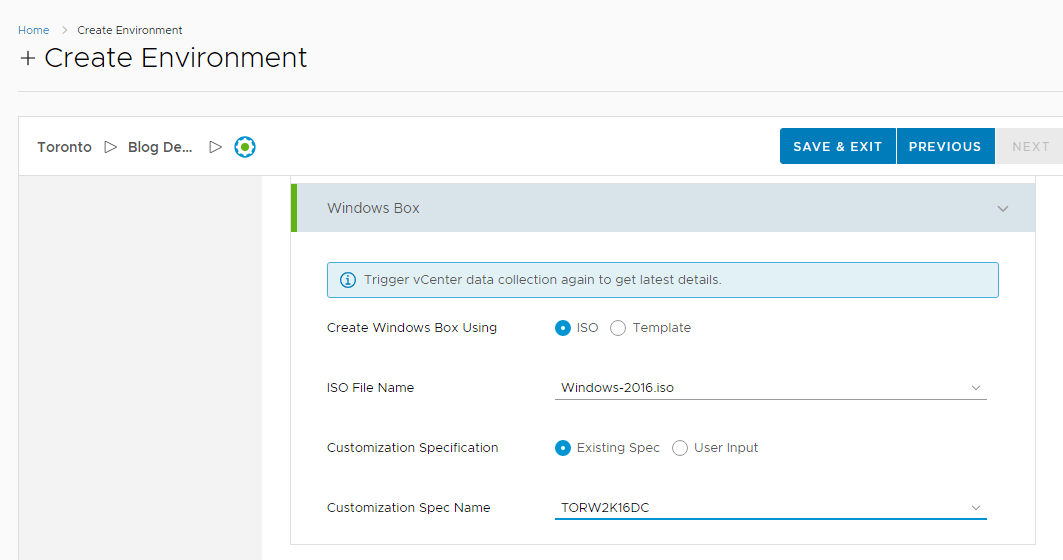
Under the Windows Box section since we answer Yes. Select ISO then Select the ISO file Name we uploaded in Step 1.
Select Existing Spec for Customization Specification. I have one that I already created in vCenter Server for Windows 2016 Virtual Machine deployment that will join the provisioned windows machine to the domain.
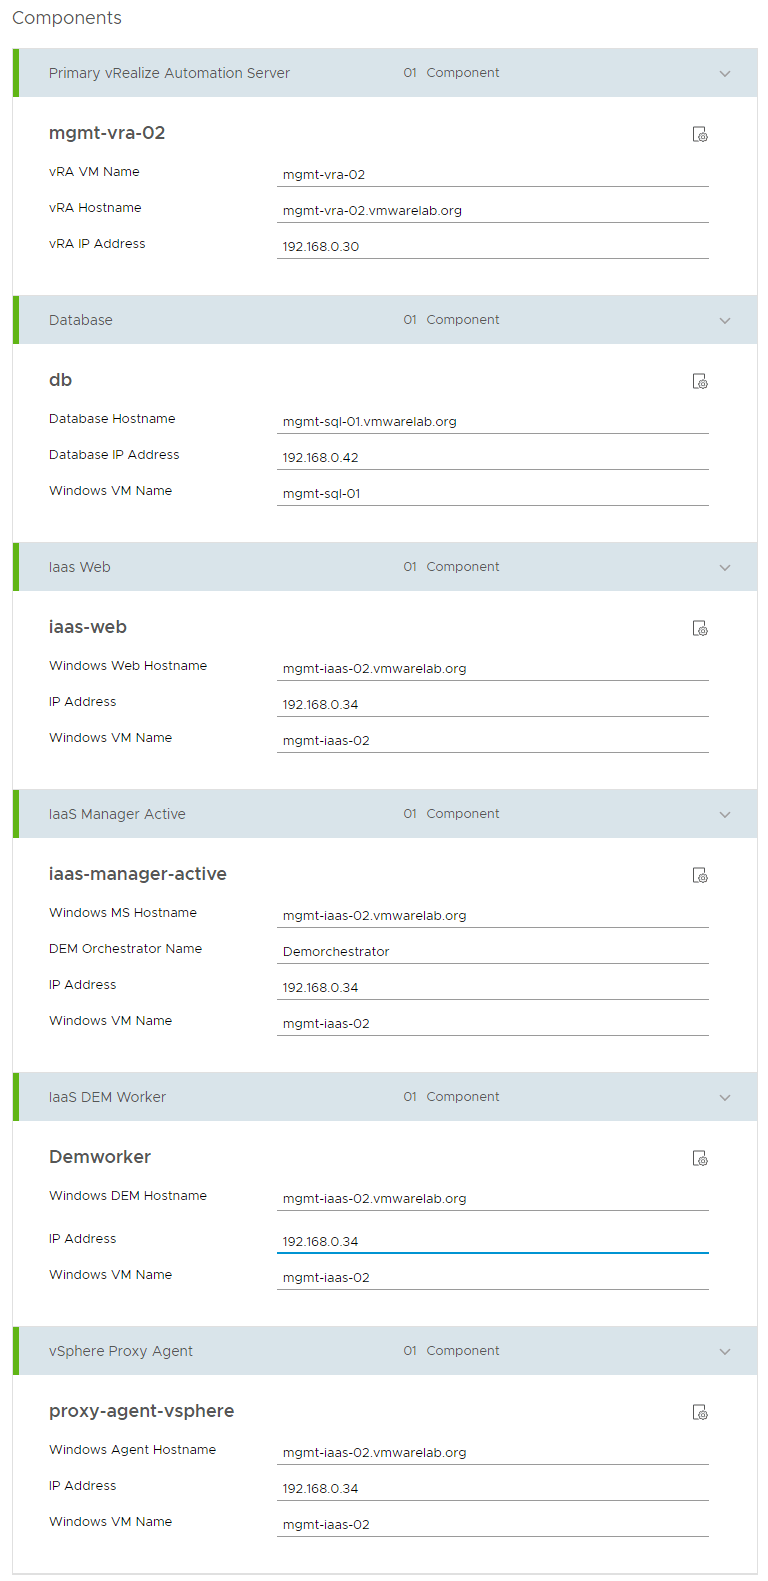
Scroll down to configure all the Components that will be running on the Iaas Server
A clarification here for some of the fields . when it says Hostname that is the FQDN of the Machine and when it says VM Name, that is simply the name of the VM in vCenter.
Click NEXT when your done.
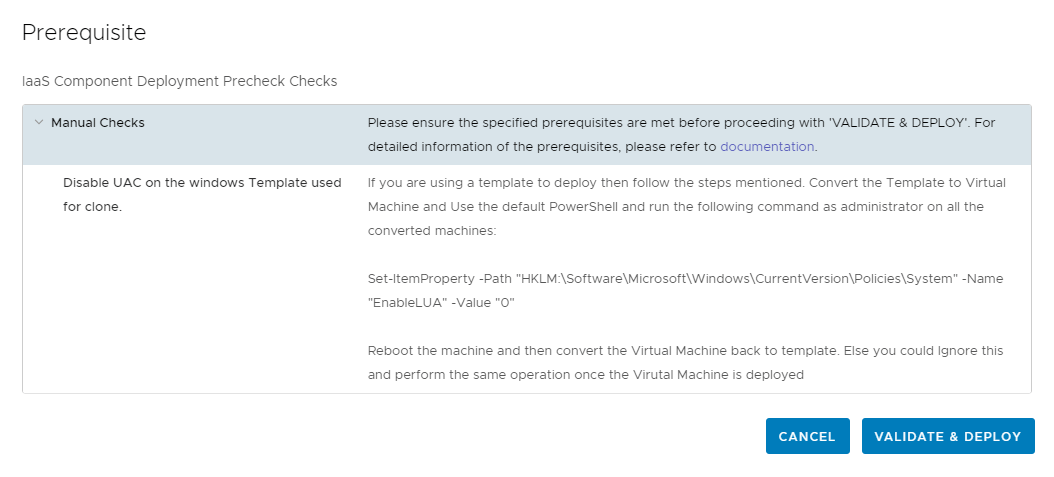
in next section will be doing a PreCheck before we can submit the request. Will start first with VALIDATE & DEPLOY. You will be presented with Prerequisites for the IaaS Component Deployment Precheck Checks. Since we are not using a template will simply ignore it for now but will perform the same operation once the VM is deployed. Click VALIDATE & DEPLOY to deploy the IaaS Windows Box.
That will upload the windows iso image first to the vCenter Content Libraries under the LCM-LOCAL-ISO-LIB which will take some time and you can monitor it in vCenter. Once its done then it will deploy the Windows ISO image as a Virtual Machine.
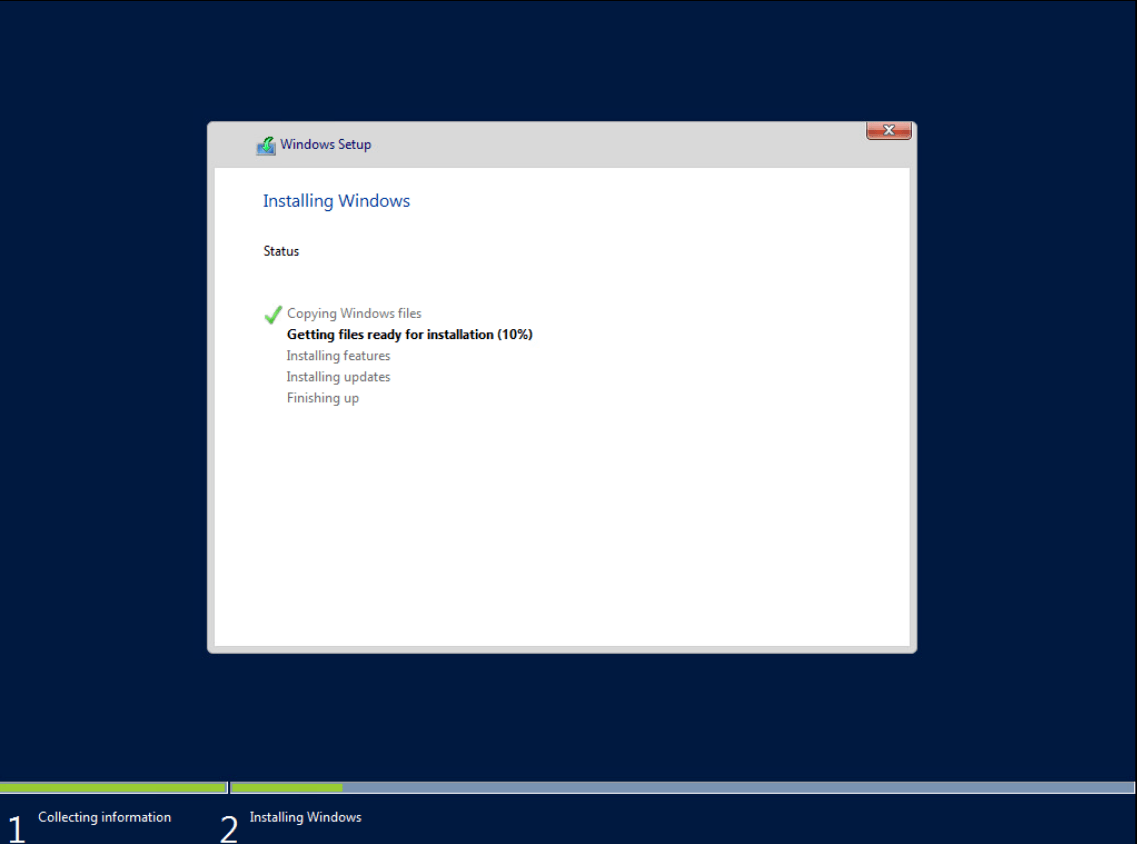
vRSLCM will make sure the build is completed and customized with all the required settings like the name of the machine / DNS , IP address and Domain membership, including installing the VMware Tools. All again based on the configuration that was submitted in previous steps. The IaaS machine is configured with 4 CPU, 16 GB and 40 GB Disk.
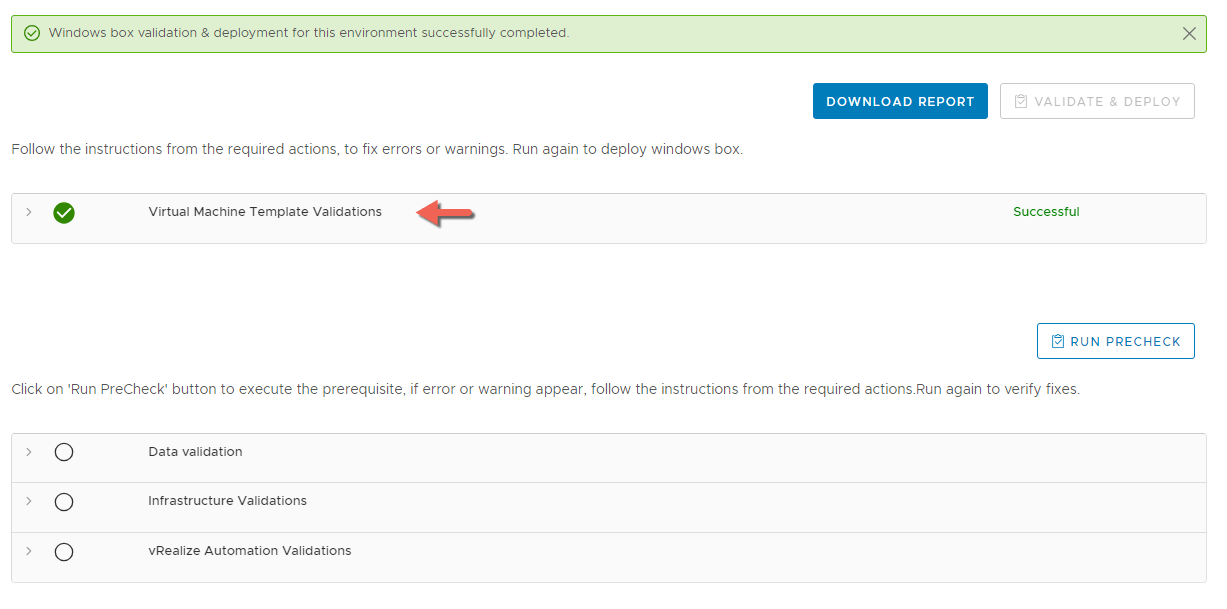
Once the vRealize Automation Windows IAAS Deployment Validation in vRSLCM is successful and before I click on RUN PRECHECK . I made sure to login to the IAAS Machine and :
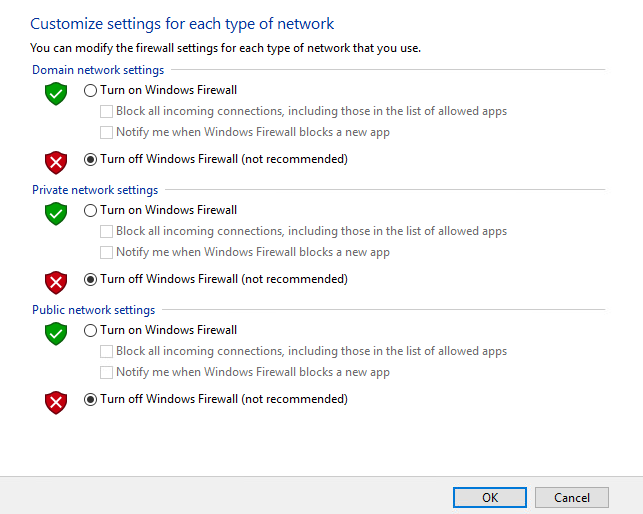
- Turn off Windows Firewall for Domain, Private and Public Network which was already set.
- Update the PowerShell execution policy to allow scripts to run by running command line and confirm by entering the letter Y
-
Set-ExecutionPolicy Unrestricted
- Disable UAC as mentioned in the Prerequisites for the IaaS Component Deployment Precheck Checks using the default Powershell running the following command as an administrator on the IAAS machine
Set-ItemProperty -Path "HKLM:\Software\Microsoft\Windows\CurrentVersion\Policies\System" -Name "EnableLUA" -Value "0"
- Upgrade the VMware Tools if there is an Upgrade available based on how recent your vSphere environment compared the VMware Tools that was installed (Optional)
- Allow remote connections for Remote Desktop under Windows System Properties
- Disable IPv6 on the IAAS Machine
- Finally I Changed the configuration of the IAAS machine to 8 GB of Memory since this is only a Lab Testing Environment (Optional)
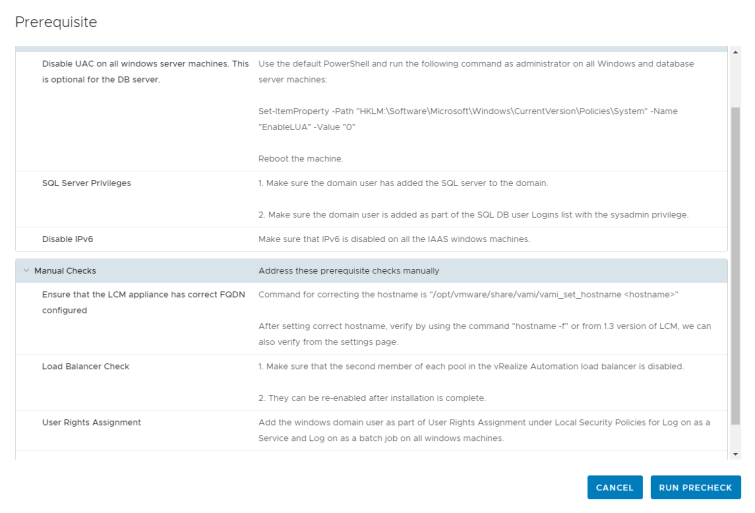
Now we are ready to click on RUN PRECHECK to execute all the prerequisites needed on the IAAS Machine which we usually automatically fix using the installation Wizard when doing the vRA deployment manually, also this allow us to see if any errors or warnings appears that we need to deal with.
We will be presented again with a Prerequisite check list which we did most of it just make sure you touch on the rest like the SQL Server Privileges and User Rights Assignment. Once your ready to do click on RUN PRECHECK and monitor its progress or you can save and exit and come back later to view the status of PreCheck.
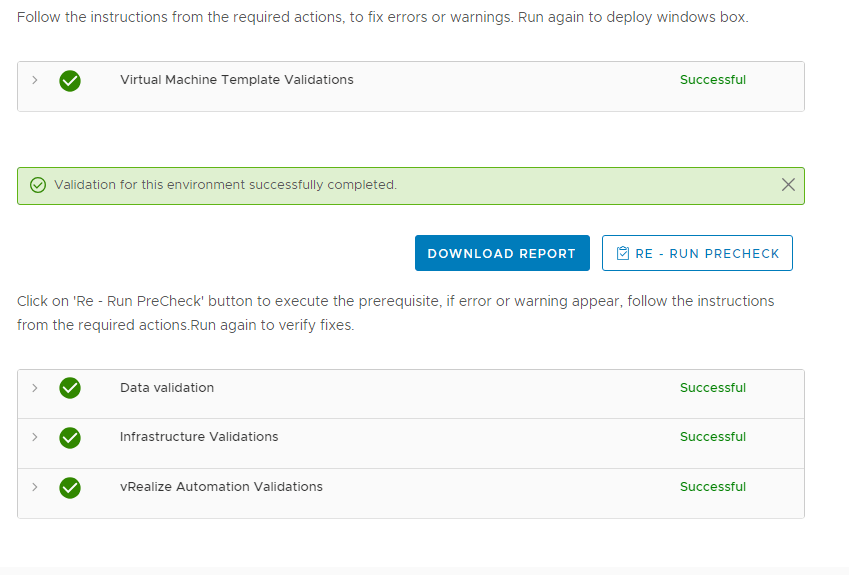
We need to verify that we don’t have any issues and everything is green across Data, Infrastructure and vRealize Automation Validations, every type of validation have tons of checks that it performs and if there is an issue, you will quickly see the reason behind it and the recommendation on how to fix it.
When fixing any issues or warnings, Keep clicking on RE – RUN PRECHECK until everything is green across the three validation type I mentioned.
click NEXT
At the top right corner you have the option to run the Pre check again when you Submit the request, in my case just for the fact that we just ran it there is no reason to run it again cause it will just save us some time, there for I turned it off.
You will also see that your presented with a summary for the all the settings you entered and an option to download it as a json file that you can use anytime if you needed to redeploy the same settings again or modified to deploy additional environment somewhere else.
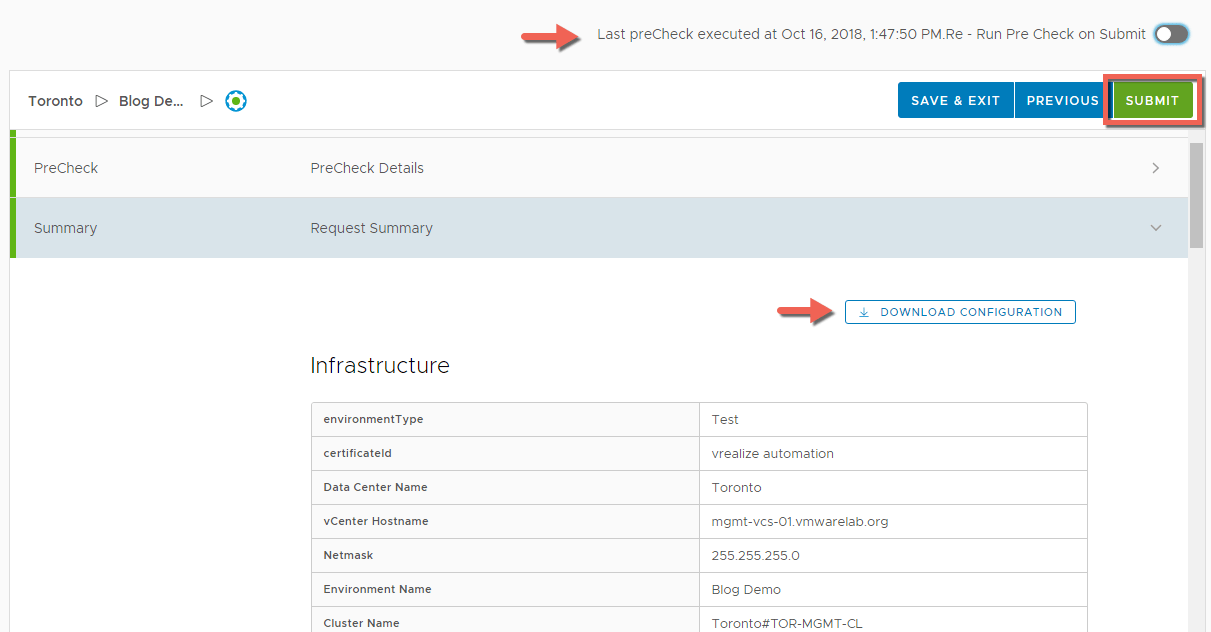
One you are ready click SUBMIT and watch the Magic Happens!
Monitor your request as it goes through visually step by step by navigating to Requests and clicking on the Request States IN PROGRESS

Once its completed successfully, you have a running vRA 7.4 Environment that you can start to configure and use in your organization, also manage and monitor going forward using vRSLCM 2.0.
now that all the steps were successful, we can try hitting the vRA Appliance URL at https://mgmt-vra-02.vmwarelab.org/
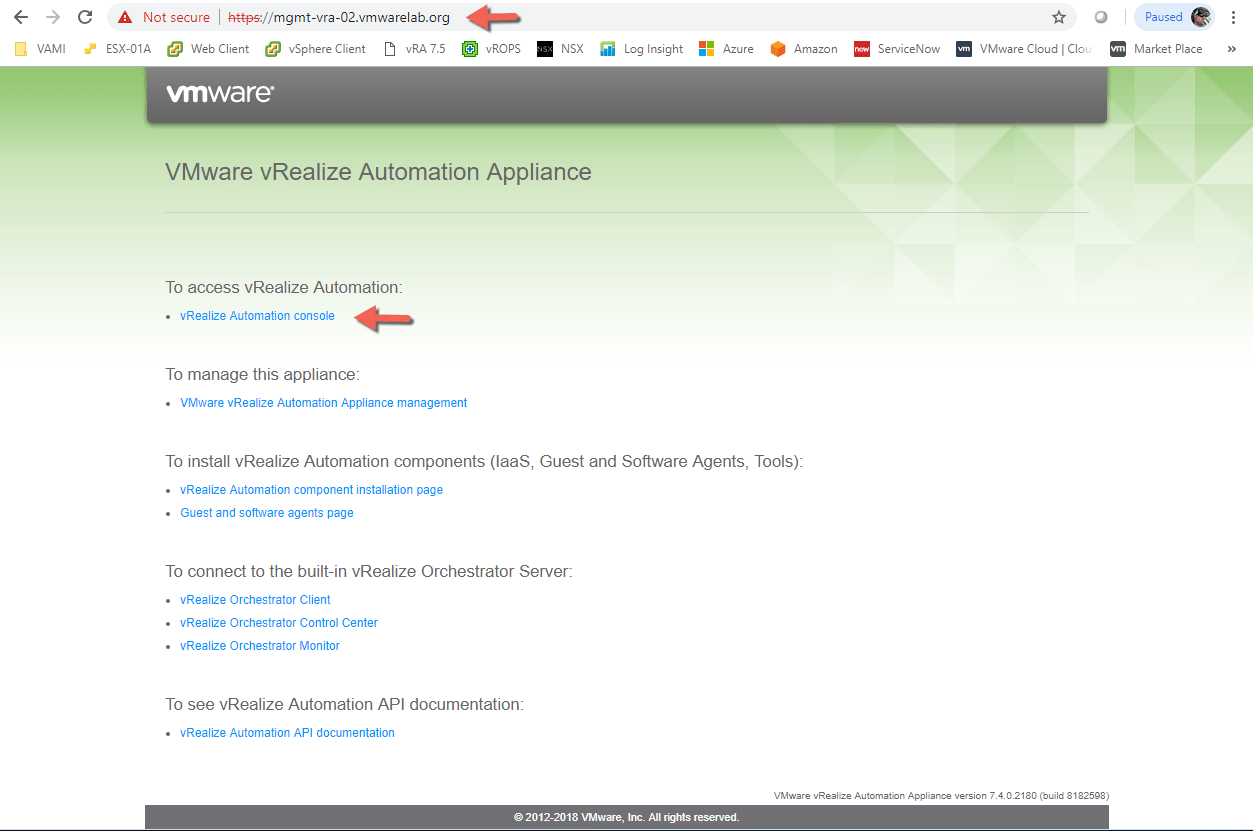
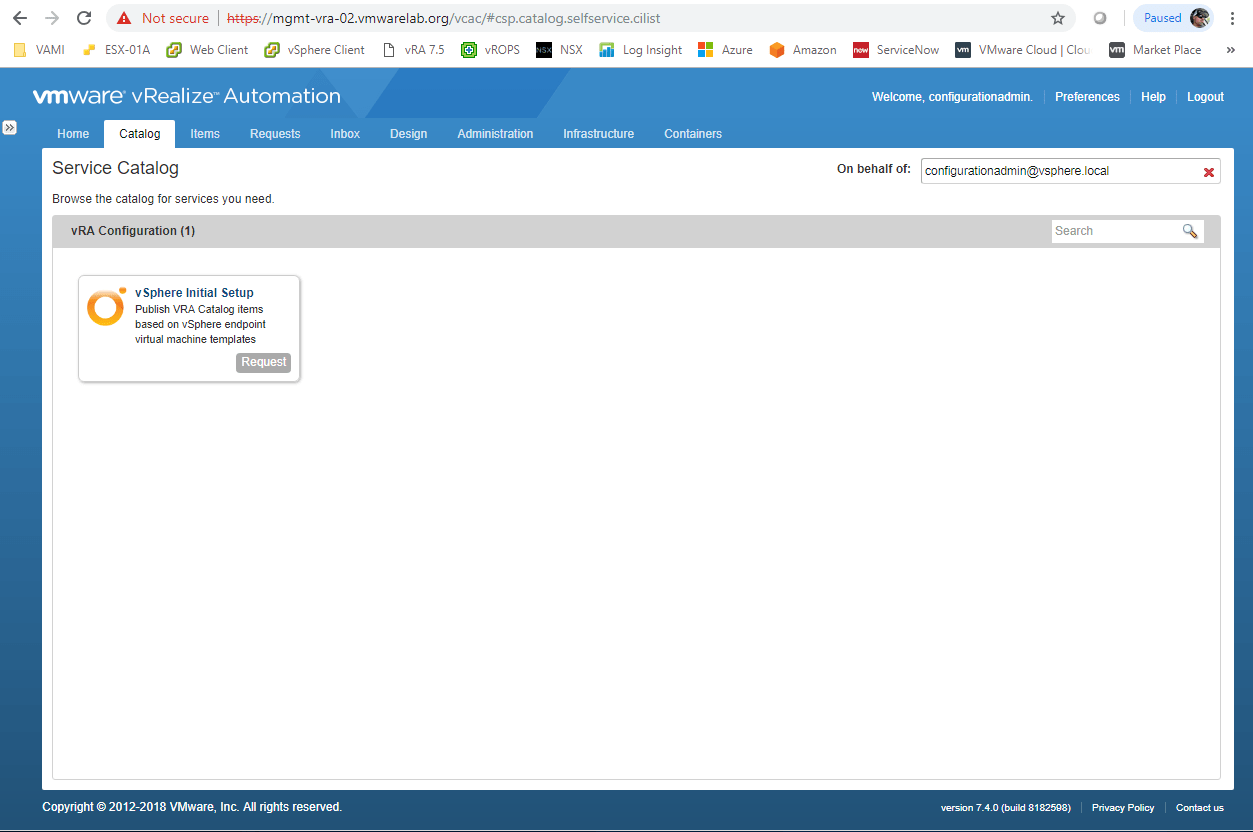
Access the vRealize Automation Console and login with the local user Configurationadmin which has both the Infrastructure and Tenant Admin Roles.
In the next part of this blog we will look at how easy it is to upgrade the vRA 7.4 instance we just deployed to vRA 7.5 using vRSLCM 2.0
The End of Part 1 Eh!


Leave a comment