When you start looking at vRealize Automation extensibility and how you can integrate it into your own datacenter ecosystem or how you can accommodate certain extensibility use cases like provisioning workloads with custom host names based on a business logic or as simple as running scripts or attaching tags post provisioning, you usually have 3 options :
- You can do it yourself. (High Time To Value, Local Skill Set)
- You can use Professional Services. ( High Time To Value , Expensive )
- You can use SovLabs Extensibility Frame work. (Instant Value, Production ready, Fully Supported, Off the shelf extensibility content and a Fraction of vRA cost)
SovLabs provides one common framework for extending VMware vRealize Automation (vRA) where you can replace custom orchestration workflow development with ready-to-run extensibility software. It brings extensibility into the SDDC framework where its :
- Managed as a native component of the SDDC directly from vRA
- Interoperable with latest releases and versions of vRA and endpoints
- Prescriptive, each module comes ready to run.
- Flexible, easy to modify without touching a single line of code
- Enterprise support ( Production ready and Scalable )
In this blog we will explore, in two parts :
- Part 1: How to install the Sovlabs Plug-in
- Part 2: How to configure basic Sovlabs Modules like:
- Custom Naming
- Microsoft Active Directory
- Microsoft DNS
- Property toolkit
- VM Tagging
- ServiceNow CMDB
Part 1 : Installing Sovlabs Plug-in 2018.3.0
Here we will be doing a new install but before we do that we need to address a few prerequisites around vRA and vRO, so please read carefully :
vRA Prerequisites
- A Working instance of vRealize Automation 7.5 where you have successfully provisioned a VM from vRA using a blueprint.
- Keep things simple according to the Sovlabs documentation by not using spaces or camel-casing for Tenant name, Users, Group Names or Business Groups. Not sure if thats the case for my vRA instance in my lab since its already setup but we shall see!
- For Clustered vRA and/or vRO, load balancing is configured to VMware’s documentation. this is not our case here but for more details check the SovLabs documentation here HA and vRA with SovLabs.
Assuming you know your way around vRealize Automation you need to have the following:
Service Account User
- You can create or use a local vRA user for the ownership of the SovLabs Endpoints, Profiles, and Services as well as connectivity into vRO to run workflows. your can create for example a new user called sov_admin but in our case we will be using the configurationadmin local user as a Service Account User, that got created during the content creation at the end of the vRA deployment.
- Make sure the Service Account User has the following roles in vRA : IaaS Administrator, Tenant Administrator, XaaS Architect.

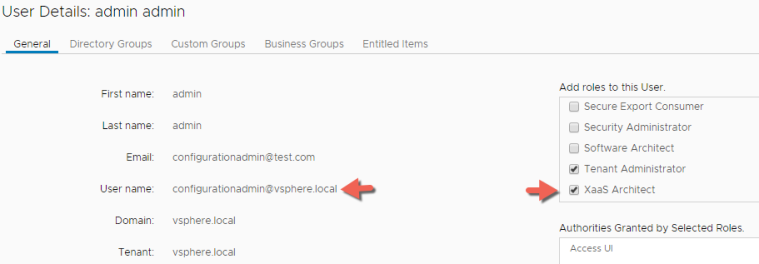
vRA Custom Group
- Create a Custom Group in vRA for the ownership of the SovLabs Endpoints, Profiles, and Services as well as connectivity into vRO to run workflows called sov_admins for example and make the configurationadmin Service Account User a member of this group.
- Grant the sov_admins Custom Group both the Tenant Administrator and XaaS Architect Roles during the creating of the vRA custom group

- Make sure that the Custom group sov_admins also have the IaaS Administrator role in addition to what we entitled it in the pervious step.

vRA Business Group
- Login as the Service Account User configurationadmin@vsphere.local
- Create or use a SovLabs specific vRA Business Group for allowing entitlements and ownership of SovLabs content to be confined to its own group. in our case we will be leveraging the Configuration Administrators Business Group, that got created during the content creation at the end of the vRA deployment.
- Make sure to add the Sov_admins Custom Group to the Group Manger Role field within the Configuration Administrator Business Group.

vRO Prerequisites
- vRO is already Setup and configured .
- vRO may be embedded (recommended) like in our instance here or it can be also external. You can refere to VMware’s Install and Configure document.
- vRO is Setup as an Endpoint in vRA, so click on the Infrastructure tab > Endpoints > Endpoints > Orchestration > vRealize Orchestrator to add your embedded or external vRO endpoint in vRA.

Modify Files and Set Permissions
- Modify vmo.properties and js-io-rights files and set permissions. To do that SovLabs provides an script you can download from here called sov_vro_config.sh to automate the modification of those two files and it also creates the krb5.conf file for Kerberos Authentication.
- Copy the sov_vro_config.sh script to your vRA/vRO appliance since we are using the embedded vRO, its actually the same appliance.
- Make the script executable by executing the following command then execute the script and follow the instructions.
chmod +x sov_vro_config.sh
- Restart the vRO service by executing the command
service vco-server restart
Create vRO vRA Host
- Create vRO vRA Host via vRO Workflow as the default vRA host will not work fr the SovLabs plug-in. The vRA Host must be Shared Session mode and since we are using vsphere.local as our default and only tenant, the name to use for vRA host endpoint should begin with sovlabs_
- Login to vRO using the vRO client and switch to the Design Mode
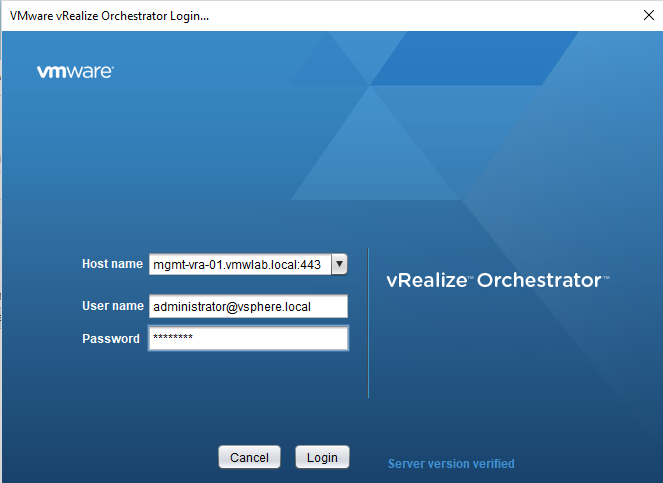
- In the Workflows tab, go to: Library > vRealize Automation> Configuration > Add a vRA Host
- Right-click the workflow and click Start workflow and fill out the form:

- Click Next in the form wizard
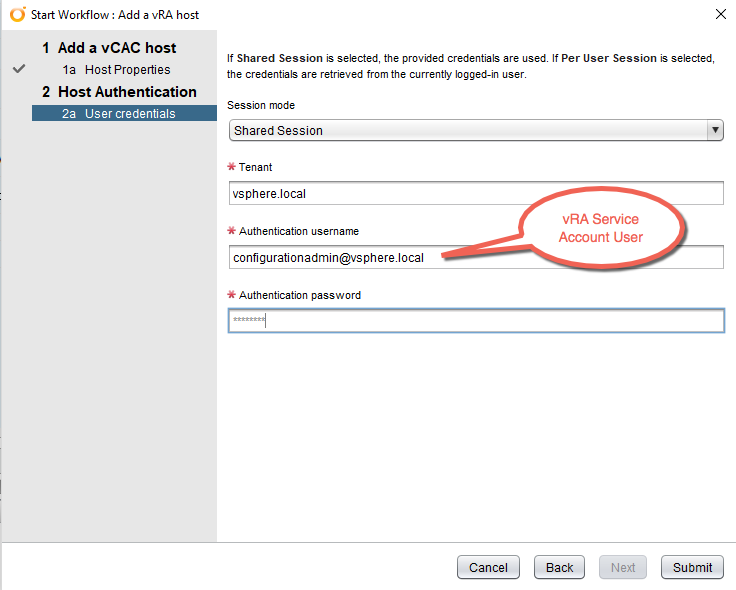
- Click Submit in the form wizard
- New Inventory item for the vRA Host will be in the Inventory tab in the vRO client.
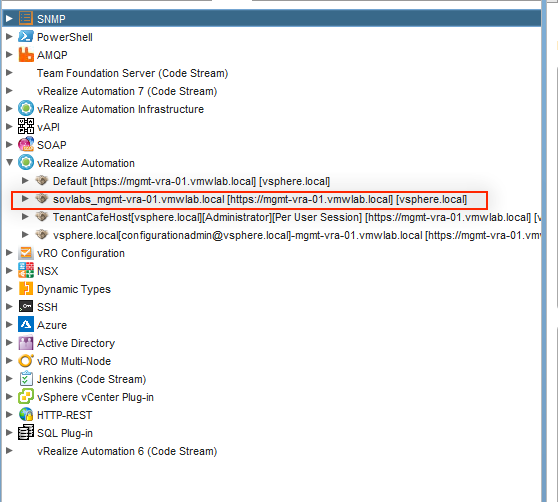
Create vRO vRA IaaS Host
- Back in the Workflows tab in the vRO Client, go to: Library > vRealize Automation> Configuration > Add an Iaas host of a vRA Host
- Right-click the workflow and click Start workflow and fill out the form:
- Choose the vRA host in the list that we created in the previous step


- Click Next for Host Properties and accept the defaults. The fields should all be auto-filled

- Click Next for Proxy settings

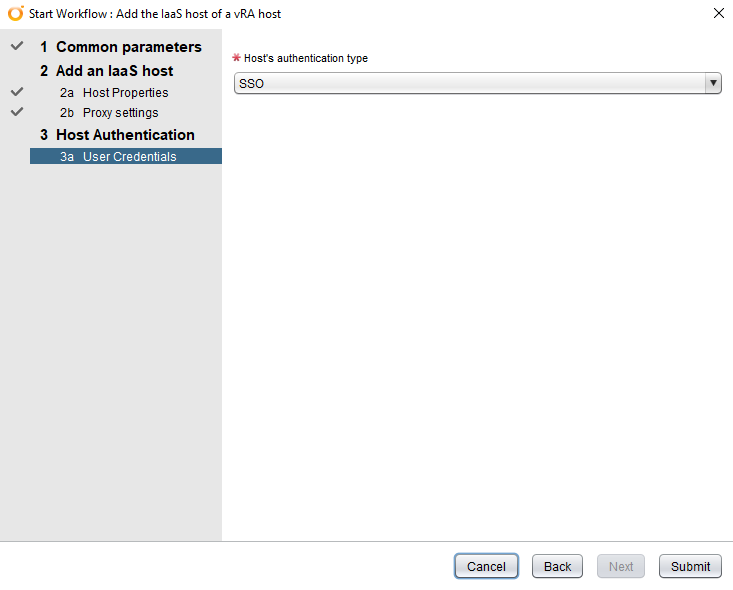
- Click Next for User credentials. Since we are using the embedded vRO, we will be selecting SSO and click Submit
- New Inventory item for the vRA IaaS Host will be in the Inventory tab in the vRO client. You may need to refresh the vRO Client

Installing the SovLabs Plugin
- Assuming your already download the SovLabs plugin along with the license key provided to you in an email from SovLabs its time to install the plugin.
- Login to the vRO Control Center as user root https://%5BvRO-FQDN%5D:8283/vco-controlcenter/ . Make sure that the Orchestrator user interface is started and running.

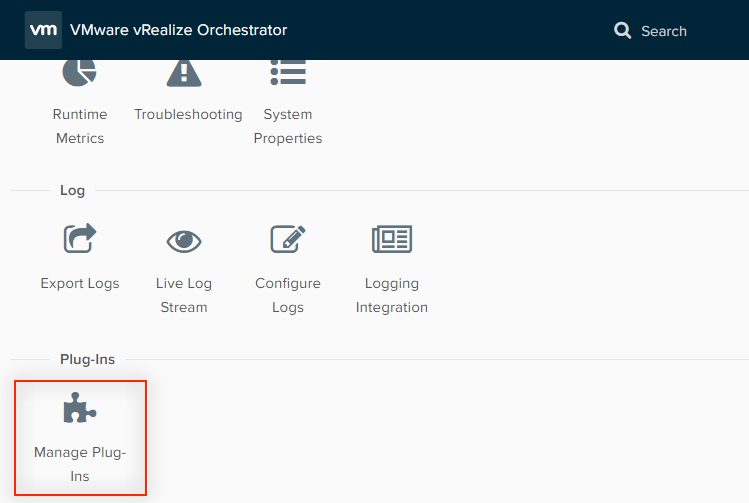
- Click on the Manage Plug-Ins icon
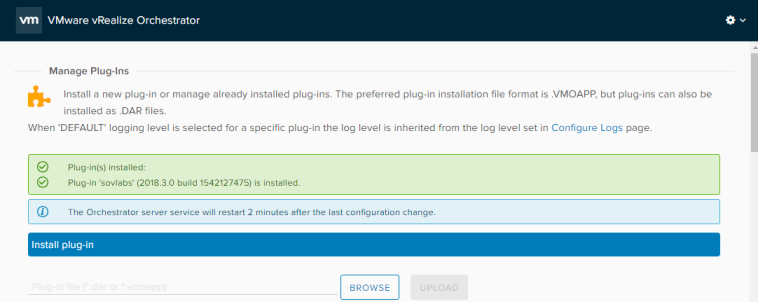
- In the Install plug-in section, browse for the SovLabs Plugin file (
o11nplugin-sovlabs.vmoapp) - Click Upload

- Accept the EULA and click on Install

- Restart the vRO Server or wait for the server to restart on its own
-
- On the Home page, click on the Startup Options icon and click on Restart
-
- Optionally, SSH to the vRO appliance and type in: service vco-server restart
- Click on theManage Plug-Ins icon and Verify that the SovLabs Plugin is listed among the installed vRO plugins

- Restart vRA
Configure the SovLabs Plugin
- Login to vRO using the vRO client and switch to the Design Mode if you haven’t already.
- In the Workflows tab, go to SovLabs > Configuration folder and expand it.
- Right-click on the SovLabs Configuration workflow and click Start Workflow.
- Accept the EULA by selecting Yes and click Next

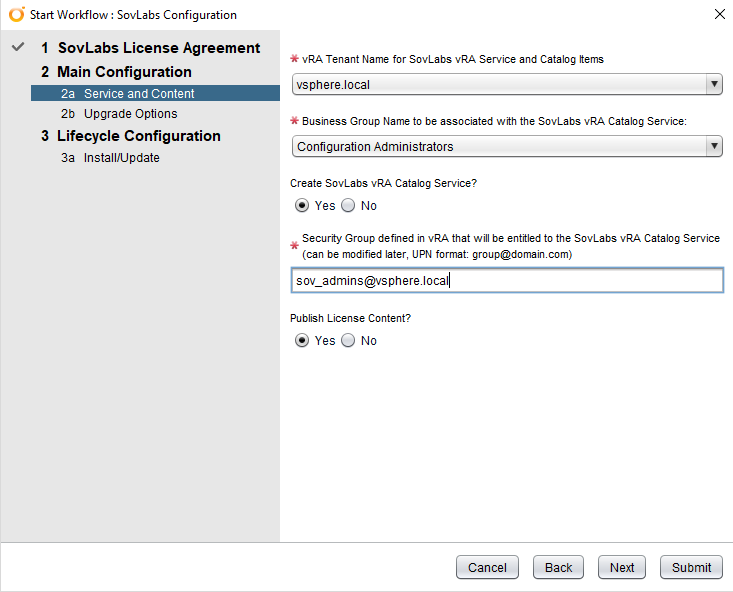
- Under the Service and Content :
-
- Choose the appropriate tenant = vsphere.local
-
- Choose the SovLabs Business Group= Configuration AdministratorsRemember Earlier I mentioned that will be using this BG for SovLabs
-
- Select Yes to Create SovLabs vRA Catalog serviece
-
- Choose the SovLabs vRA Custom Group we created earlier, that will be your security group = sov_admins@vsphere.local
-
- Select Yes to Publish License Content
-
- Click Next
- In the Upgrade Options section of the form: Select No and click Next. Since this isn’t an upgrade
- In the Install/Update SovLabs Workflow Subscriptions section of the form: Select Yes. This will create all the needed Event Broker Subscriptions in vRA
- Click Submit
- Once completed you should see green check on SovLabs Configuration Workflow and for both its Sub Workflows

Add SovLabs Latest License
For the SovLabs latest Plugin to works it needs a 2018.x.x license key. Here are the steps to add the License Key
- Login to the desired vRA tenant which is in our case is vSphere.local and login using the Service Account User configurationadmin@vsphere.local
Totally Optionals :
-
- In my case and because I want to continue to use my main account cloudadmin@vmwlab.local user, I simply granted the User Role to the cloudadmin user in the Configuration Administrators Business Group
-
- Then added the Cloudadmin user in the SovLabs vRA Extensibility Modules Entitlement created by the SovLabs plugin.
- Now that I have access I can Click on the Catalog tab, then Click on the catalog item Add License – SovLabs Modules

- Click Request and Copy and paste the provided license key and click SUBMIT

Note : The Screenshot shows a fraction of the license key, not the entire license key. 🙂
- You can Monitor your In Progress request in the Deployments Tab

- After the license is successfully added, SovLabs Catalog Items and SovLabs vRA Event Broker Subscriptions will appear/generate.
Thank you very much if you have made it this far, in part two will touch on How to configure basic Sovlabs Modules like:
- Custom Naming
- Microsoft Active Directory
- Microsoft DNS
- Property toolkit
- VM Tagging
- ServiceNow CMDB
Please feel free to comment or provide feedback
The End of Part 1 Eh!

