
Now that we have seen and understand how to deploy vRealize Automation 7.4 using vRealize Suite LifeCycle Manager 2.0 in Part 1 of the blog, we are ready to continue using vRSLCM to upgrade the vRA 7.4 instance we deployed to vRA 7.5.
So let’s get started Eh!.
Right away and when logged in vRSLCM we see a notification alert that vRA 7.5 is avaiable for Environment Blog Demo which you can mark as Read to clear it out.

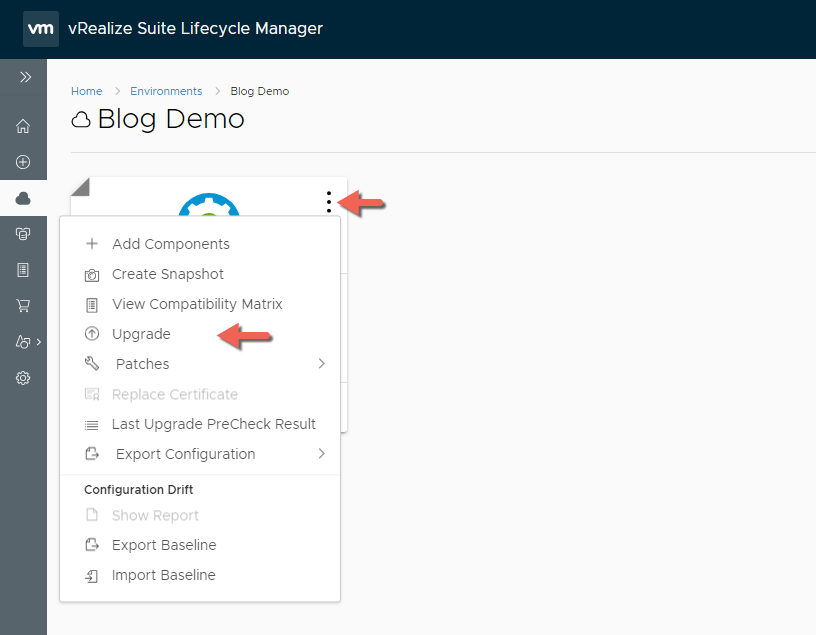
Now lets dive into the Blog Demo environment by clicking VIEW DETAILS then clicking on the vertical 3 dots to explore the options we can take against this environment, once the menu is available to us, let’s select Create Snapshot from the menu since I only have vRA 7.4 in this environment. Please be aware that doing it from this level will create a snap shot across all the products and there components that are either deployed or imported to the environment.
Snapshot for vRealize Automation is taken for all the components except IaaS DB. Creating snapshot of IaaS DB is not supported by vRealize Suite Lifecycle Manager. Ensure that the appliances are in a consistent state before triggering snapshots.

Provide a Snapshot Prefix Name that will be set in front of the generated Snapshot date and time stamp name and check the box to Snapshot with Memory if you like then click SUBMIT
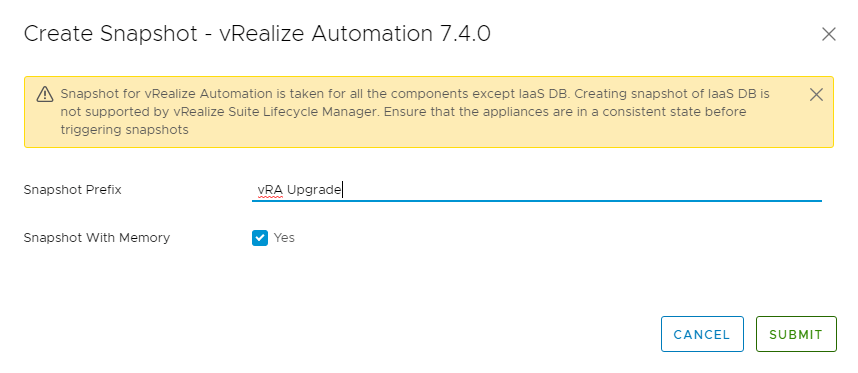
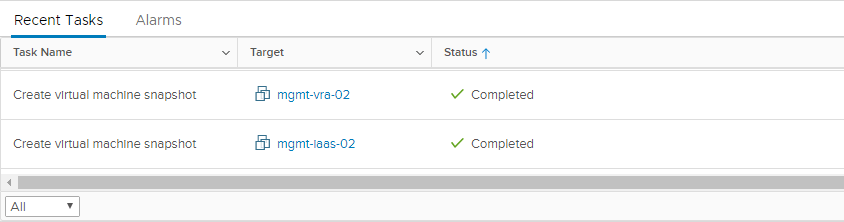
In my experience the Create Snapshot window was still there even though I already hit SUBMIT. So I had to click CANCEL after verifying that the Snapshots was completed in vCenter Recent Tasks.
Now we are ready to Upgrade so let’s click on the vertical 3 dots again but this time once the menu is available to us, let’s select Upgrade from the menu.
Under vRrealize Automation 7.4 Products Details we will be presented with a couple of important choices like taking a snapshot for the IAAS Machine after the vRA Virtual Appliance Upgrade.
This would be a 2nd Snapshot but this time its after the vRA VA is upgraded so if an IAAS component upgrade fails, then you can revert to the post-upgrade VA snapshot for the failed IAAS component. When you want to retry, you do that from the command line and enter true in the retry input for upgrade.
Next we will select the Repository Type. In my case I have already copied the vRA 7.5 upgrade ISO to vRSLSM Binaries which I outlined in first part of this blog, therefore we are going to select vRealize suite Lifecycle Manager Repository which will automatically select 7.5 as the product version since its the only one available that I can upgrade to that I uploaded.

Click Next and click RUN PRECHECK to do the Data and vRealize Automation group set of Validations. In my case it was all green for the two validations so I Clicked SUBMIT to follow with the upgrade.
You can monitor as we mentioned before your Request in the Requests tab menu by clicking on the IN PROGRESS under the Requests States column for the Upgrade Product request.

Here you can track each of the steps as they execute or come back to it anytime later for a status update.

You can also find what each of the tasks are doing within a step and find out how much time each of the steps took to complete.
now that all the steps were successful, we can try hitting again the same vRA Appliance URL at https://mgmt-vra-02.vmwarelab.org
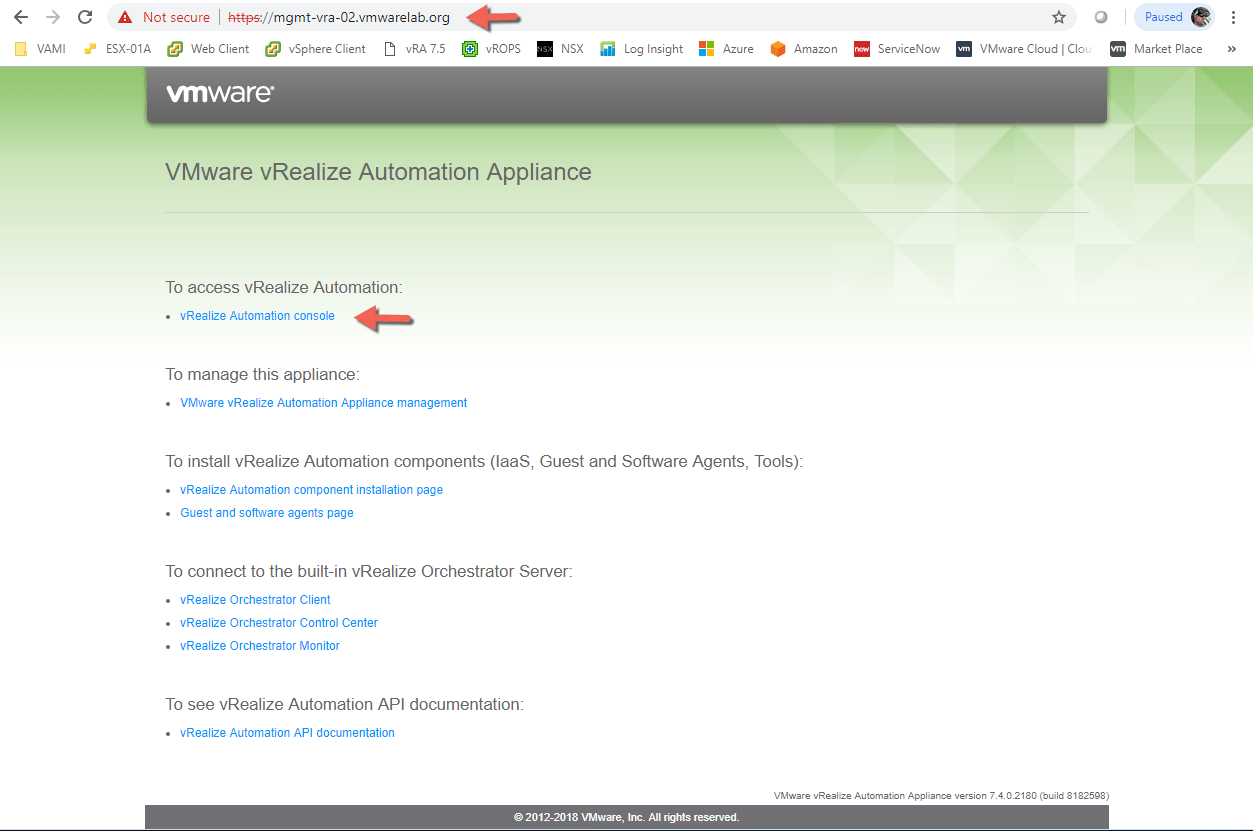
Access the vRealize Automation Console and login with the local user Configurationadmin which has both the Infrastructure and Tenant Admin Roles.

What did I tell you ? It’s Magic! Just like that its all upgraded and ready to go.
The End Eh!


Leave a comment